Grandma made another contribution to our feast this year: pie crust. Though I never witnessed it myself, I've heard many times that Grandma's slices of pie were more than generous, and if you weren't having seconds of such helpings, you weren't doing your duty to clean up the leftovers. Also, it was quite possible you may offend the cook by refusing! We don't want to do that.
As members of Grandma's posterity, it's fallen to us to carry on the tradition of pie aplenty. So this year our family of five made three pies, (we did share a little...) and they were gone Friday morning.
Everyone knows the best pies start with a perfect crust. My mama has an amazing recipe too, but I've only tried it once and it had to be in her presence--I was too worried I'd ruin it! So until I master that one, we'll share Grandma's recipe.
Start by combining the flour and salt.
Cut in the shortening--you can use two knives, a pastry blender, or a fork.
The dough will be crumbly at this point...
Next, mix together your egg, vinegar and water in a small measuring cup. Make sure everything is good and cold. Drizzle in about half of it, then use your fork to gently combine.
Don't over mix this dough!! Just keep splashing in a little liquid at a time until the dough holds together. You'll probably use most of the liquid mixture.
Now, my hubby (who will heretofore be referred to as "Mr. Pots," explanation later) uses two sheets of wax paper or plastic wrap to gently roll out his dough without using extra flour and ruining the flaky and tender, melt in your mouth wonder that is a perfect pie crust. However, I'm here to tell you you can still have (almost) perfect by using the flour method, if you're gentle and loving with your dough.
So sprinkle your work surface lightly with a little flour.
Roll it out carefully. Be warned: it will stick to the work surface and to your rolling pin.
To pick up the crust and move it, this is the easiest way I've found: fold it in half first,
then in half again, so it's folded in quarters.
Carefully pick it up and transfer to your pie plate.
Then gently unfold it. If it tears or has holes, just patch with a little extra dough. This is a gorgeous, rustic, old fashioned piece of art, not a store-bought freezer pie crust.
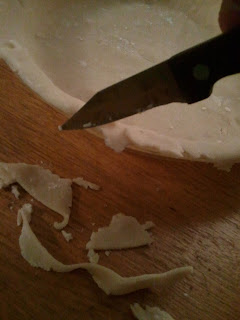
Use a sharp knife to trim excess if you want. My sister-in-law LOVES the crust, so she leaves it and pinches it into the fluted edges. I'm not as talented as she is, so I go ahead and trim it.
To flute the edges, pinch with one hand and form a little barrier with the other, using thumbs and forefingers like so:
Sorry about the angles--self photography is not easy.
If your recipes calls for an unbaked pie crust, don't bake it, silly. Otherwise, place the pie crust in a 400 degree oven for about 8 minutes. It will still be very pale--you want it like that.
See? Still that layered flaky crust. You'll have to take my word for it on how tender and wonderful it was. It literally melted in my mouth.
Grandma's Pie Crust
2 1/2 cups flour
1 tsp salt
1 cup shortening
1 egg
1/4 cup ice water
1 T vinegar
Combine flour and salt in medium mixing bowl. Cut in shortening. Combine egg, ice water and vinegar in small measuring cup and mix well. Sprinkle liquid a little at a time into mixing bowl, using fork to gently pull dough together. Do not over mix. You may not use all of the liquid. Divide dough into three balls. Gently roll out using two layers of wax paper or a lightly floured work surface. Place in pie plate and flute edges. For prebaked crust, bake at 400 for about 8 minutes, or until tips and edges are very slightly toasted.


No comments:
Post a Comment