Monday, November 12, 2012

Sausage Braid


We're in freezer cooking mode around here.  All by itself, that's a big topic for another day.  But in the meantime, there are a few recipes here on the blog that are freezer friendly and can get you started.

This particular recipe was a "try it and see" experiment out of a cookbook I bought.  The book, Family Feasts for $75 a Week by Mary Ostyn, had a lot of useful information for me about budgeting in the grocery department and how to successfully feed a family frugally, healthfully, and homemade.  However, as is the case for any family tastes, we had our favorites and they didn't quite match up with very many of the recipes in the book.  

This recipe actually came out of the lunch section, and the author suggests slicing it and packing it like sandwiches.  So when we tried it the first time we did just that, and took it on a family day trip to the coast.  However, what we found was (while it was delicious) it was not very travel friendly.  All the filling has problems with staying put in the bread or in your mouth and not landing in your lap in between.  

We tried one remedy, which was to make "pocket pie" versions with the same filling.  Those were good, but for me personally, I just didn't love the cold sausage thing.  

SO good recipe idea--bad execution or purpose.  It just needed a simple reworking.  And I also altered it a bit to our family's tastes, using homemade pizza dough rather than store bought frozen bread dough, and tweaking the filling here and there with ingredients we kept on hand more regularly.

Start out with the pizza crust.  Our recipe can be found here.  If all you have time for is to mix up the dough, do the mixing and before letting it rise, cover and put in the fridge.  You can leave it there for up to a week if you want, but know that it will pick up a bit of a sourdough flavor the longer you wait.  When you're ready to use it, bring it out of the fridge at least 2 hours ahead of time and let rise covered while you prepare the filling.


Brown your sausage; do not drain.


Chop your veggies.  I love my food processor because:  1. it's faster and 2. my kids would usually turn up their noses at bell peppers and onions, but chopped finely enough, they'll never know what hit them.


I go for about a fine chunky salsa consistency...


Add the vegetables to the sausage and simmer until veggies are tender and onions transparent.


Don't hate me, but don't drain the grease, man.


Instead, add more fat.  Cream cheese, specifically.  I confess to going a little overboard on this round; I usually prefer a less cream cheese to "other stuff" ratio.  I'll give you the better ratio in the recipe below.


If you get the cream cheese into chunks, it softens and blends in a little faster.  You can leave the heat on, but leave it low and slow for just a few minutes and turn it off.  Frequent stirring is better for melting the cream cheese--you don't want to burn it.


Roll out the dough.  I usually go for about as wide as the rolling pin (8-10 inches) and about as long as my pan (16-18 inches in my case).  You want the loaves to fit, you know!  


Add the filling and begin the braid by cutting the same number of 1" wide slits to within 1/2" of filling.


Begin by folding the bottom up...


 and tucking in the ends.


Then start criscrossing (yes, that's a word) the strips of dough, tucking them in as you go.


Now, you can finish it prettier than I do, but this it what I do so it doesn't fall apart and I end up with sausage goo oozing out onto the tray. 

Stop two rows before the end.


Tuck up the end first...

and then crisscross the extras and tuck 'em in.


Place that baby on a baking sheet and bake it.  Don't let it rise.  If you do, your braid will crack and you won't like it.  If you want it to be shiny and gorgeous, brush it with a beaten egg before baking.

Serve sliced and warm, or let cool completely before wrapping in foil and freezing.  To reheat, unwrap foil and bake on a tray for about 30 minutes.

Sausage Braid
adapted from Family Feasts for $75 a Week, by Mary Ostyn

1 lb sausage
2 bell peppers (I use green)
1 onion (large, or two small)
1 package cream cheese, softened (8 oz)

Prepare dough and set aside.  Brown sausage; do not drain.  Chop veggies to desired chunkiness. Add to sausage and cook until tender.  Turn heat down to low and stir in cream cheese, stirring frequently until cheese is just melted.  Remove from heat.  Divide dough into two.  Roll out into rectangle/oval, about 10"x18".  Place half of filling down middle of dough, leaving 1 inch on each end and 3 inches on each long side.  Braid dough.  Brush with beaten egg if desired.  Place on greased baking sheet and bake at 375 for 20-30 minutes, or until golden brown.  If freezing, keep the baking time closer to 20 minutes, let cool completely, wrap in foil and freeze.  To reheat, unwrap foil completely and reheat on baking sheet in 350 oven for about 15-20 minutes, or until center is warmed through.  Otherwise, serve sliced and warm!

Saturday, November 10, 2012

Food Storage


This is our basement food storage. What you see before you is our collection of beans, fruit, baking supplies, squash, wheat, juice and spices. Behind me is a fridge with a few (maybe 5) items in the fridge and freezer. Also behind me is a chest freezer full of meat. Under my bed I have boxes of #10 cans, full of the staples like beans and macaroni. Under a bed at my in-law's are more boxes of #10 cans, full of hard red wheat.

Some of you are thinking, "Wow, they're nuts!" and some of you might be thinking, "How did they amass so much?" and some of you might be thinking, "I could never do that."

Good news!

You can do it! It's not nuts and it takes time to accumulate. But it's possible, it's healthy and best of all--it's a way to live providently. So why do we have so much food storage and how in the crazy did we get there?

Let me start back, oh, about 6 1/2 years ago. See, that's when we got married. And we had a brilliant idea. At our reception in Utah, with all our poor, college friends, we asked that instead of wedding gifts, they each bring a can to start our food storage. We ended up with a smattering of items and enough for us to live on for 3 weeks or so. During our first four years, we were exceptionally poor. We're talking single digit living here. Not in our bank account (that was more like double digit), but on our poorest year we made $8000 a year. With a baby. Frugality and buying food cheaply became a way of life.

For me, it was hard. My husband grew up with parents who cooked a lot from scratch, had a food storage, used and rotated it. My parents bought it and never used it. My mom doesn't like to cook. But both our parents taught us how to manage money well and how to be smart. So we learned. We learned it was worth spending extra from our budget on a big sale of canned items. And that we could afford to buy one extra pound of spaghetti every week.

But it wasn't really until we moved to Ohio, two years into our marriage, that I really got into food storage. Remember, we were poor for 4 years, so when we moved to Ohio, we weren't definitely not in the money. When we moved to OH, my mother-in-law taught me the incredibly difficult and complicated art of canning.

Okay, it's not that difficult or complicated. In fact, it's not difficult or complicated at all. With a pressure canner at my disposal (best used purchase EVER!), I learned how to can. We never turned food down, even if we didn't know what to do with it. We bought pumpkins after Halloween for cheeeaaappp and canned that instead of buying store canned pumpkin. We found bushes of fruit and made our own jam, for only the price of the pectin. We grew our own tomatoes and accepted people's surplus. And among all this, we continued to buy a few extra cans here and there. With our tax return, we gave ourselves a few hundred dollars to go to Sam's Club and buy in bulk there. I always buy cans from the "dent and clearance" section at Kroger, as long as they're not rusty.

6 1/2 years later, we have this. It's not perfect. I still don't know how to use wheat except to grind it. I have never canned meat. And I have a hard time planning my meals from my "basement market". I love cold cereal even though it is expensive.

But I'm still learning. What I've learned so far has allowed us to save a significant amount of money. We only buy basic ingredients and make nearly everything (except cheese and sour cream) from scratch. We make several food storage meals a week that everyone enjoys. And the best part is that I'm teaching my children skills that I wish I had had before I got married.

So what does this mean for you? This means that I'm going to showcase recipes and techniques for food storage. So that you can start buying a few extra cans here or there and have a little extra. Because it's really not that hard or expensive. So go out there and buy an extra can this week!

Thursday, November 8, 2012

Homemade Hot Cocoa Mix


I'm Liz.  ("Hi, Liz.")  This is my 137th day in a row drinking hot cocoa.

I have this problem.  I really enjoy hot cocoa.  When my friends in high school all picked up their Starbucks and I tagged along, me and my non-coffee-drinking self learned to love their hot cocoa.  

Now, this does not claim to match that.  Nor will it come anywhere NEAR Ghirardelli's Drinking Chocolate you can order in San Francisco or Monterey.  But if you need a hot cocoa fix--a real one, not from one of those foil packets--here you go.

This recipe is for 1 gallon, but I'll show you how to make single servings, too.

Combine dry milk powder, sugar, cocoa and salt in mixing bowl and whisk together until well combined.


One serving size is 1/3 cup mix, so... 


scoop it into a mug of hot water, 


or if you like the ease of those foil packets but hate all the "extras," scoop it into a zip-top bag and label it as one serving.


Homemade Hot Cocoa Mix

3 cups dry milk powder (I use non-instant)
3/4 cup cocoa
3/4 cup sugar
1/2 T salt

Combine ingredients in mixing bowl.  For single serving, scoop out 1/3 cup and add to 1 cup (8 oz) HOT water.  Otherwise, combine with 1 gallon HOT water (large pot works well for this).  Do not mix with cold water unless you want lumpy cocoa!


Tuesday, October 23, 2012

Ultimate Chocolate Chip Cookies


Okay.  Before we begin, I have something to say.  I am of the opinion that everyone loves chocolate chip cookies because they are a comfort food.  You know, something your mom made for you when you were a kid so you could have a snack when you came home from school.  In our house growing up we had them every Sunday while we played games together as a family.  

That said, I believe that the version you love will also be dependent upon the experience you had growing up.  Since our family made them at least weekly, we've become connoisseurs (of sorts) of different varieties for different occasions, and since being married my husband has never complained about sampling the different kinds.  

One thing most regular cookie bakers swear by is butter.  REAL butter.  And when it comes to cookies, usually salted.  The reason is this:  most people seem to prefer that crispy on the outside, chewy on the inside, perfectly fudgey taste of salty-sweet heaven in every bite created by real butter.  

Let me tell you a secret.  You don't have to use butter.  (shhh! don't tell!)  And I'll only tell you the secret ingredient if you promise not to stop asking me for recipes when you like what I bring to the neighborhood potluck.

Shortening.  Crisco.  Call it what you want, but it's not butter, and it's not margarine.  

Trust me on this one.  If you like those crispy/chewy/fudgey/salty/sweet/perfect cookies but you don't feel like spending $4 just for the fat content in your dessert--try it.  But follow this recipe, so it doesn't throw things off and make you disappointed.

Ultimate Chocolate Chip Cookies
slightly adapted from Crisco

1 1/2 cups Crisco
2 1/2 cups packed brown sugar
1/4 cup milk
2 T vanilla
2 eggs
3 1/2 cups flour
1 1/2 tsp. salt
1 1/2 tsp. baking soda
2 cups chocolate chips

Preheat oven to 375.  Cream shortening and sugar.  Add milk, eggs and vanilla and mix well.  Combine flour, salt and baking soda in separate bowl and add to wet ingredients, mixing only until just combined.  Stir in chocolate chips.  Drop by tablespoonfuls onto ungreased baking sheet and bake for 10-12 minutes, or until golden and perfect.  Makes about 4 dozen.

Tuesday, October 9, 2012

Apple Streusel Muffins


A couple years ago I tried a new recipe for a cinnamon apple coffee cake.  A brave maneuver on my part, considering it was meant to be the main feature on the breakfast menu at a baby shower.  However, all the stars aligned and it came out delicious.  Everyone wanted the recipe.  

The funny part was, among my friends I have a small reputation for dabbling in homemade everything--but that coffee cake was a doctored-up yellow cake mix!  That news actually came as a relief for many of the curious recipe seekers, and obviously I wasn't left out of that group on that particular weekend!  

However, since I do my best to find the "from scratch" version of most everything my family and I love to eat, I went on the hunt.  There were a couple flops.  But I think this is the winner.  

Since I didn't know this would be "the one," I don't have step-by-step photos.  But I promise it's easy.  This recipe makes a lot, (we got 24 mini muffins and 18 regular sized) but you can cut it in half and get the same result.  Or dump the whole thing in a bundt pan like I did for the baby shower, putting half of the streusel topping on the bottom of the pan, filling with half the batter, sprinkling remaining streusel and finishing with batter.  That will probably bake for 45-60 minutes.  Add a glaze if you're feeling fancy.

Apple Streusel Muffins

4 cups flour
4 tsp baking powder
3/4 cup sugar
1/2 cup milk powder
1/2 tsp salt
1/2 tsp nutmeg
2 eggs
1/2 cup oil
1/2 cup sour cream
1 1/2 cups water (or milk if you want to omit milk powder)
2 cups chopped baking apples, peeled if desired

for the streusel:
1/2 cup flour
1 cup sugar
1 tsp cinnamon
6 T cold butter 

Combine dry ingredients in large mixing bowl.  Mix wet ingredients in large glass measuring cup.  Combine dry and wet ingredients, mixing only until moistened.  Do not over mix.  Gently fold in apples.  In a separate small bowl, combine dry ingredients for streusel and then cut in butter using two knives or a pastry blender.  Grease muffin tins or line with muffin papers and fill cups 3/4 full with batter.  (1/4 cup for regular sized muffins, 1 T for mini muffins) Cover tops with streusel topping.  (1 T for regular muffins, 1 tsp for mini muffins)  Bake at 350; 18-22 minutes for regular muffins, 10-15 minutes for mini muffins, or until a toothpick inserted comes out clean.  Remove from pans immediately to cool on wire racks before serving.

Thursday, October 4, 2012

Baked Lemon Chicken


Three things that I always have in my house are lemon pepper, lemon juice, and frozen chicken breasts.  This is the easiest dinner I make, and even though it is delicious, my husband will tell you that it gets old after a couple weeks of the same thing every night ;)  Seriously though, we probably have this at least every other week if not every week.

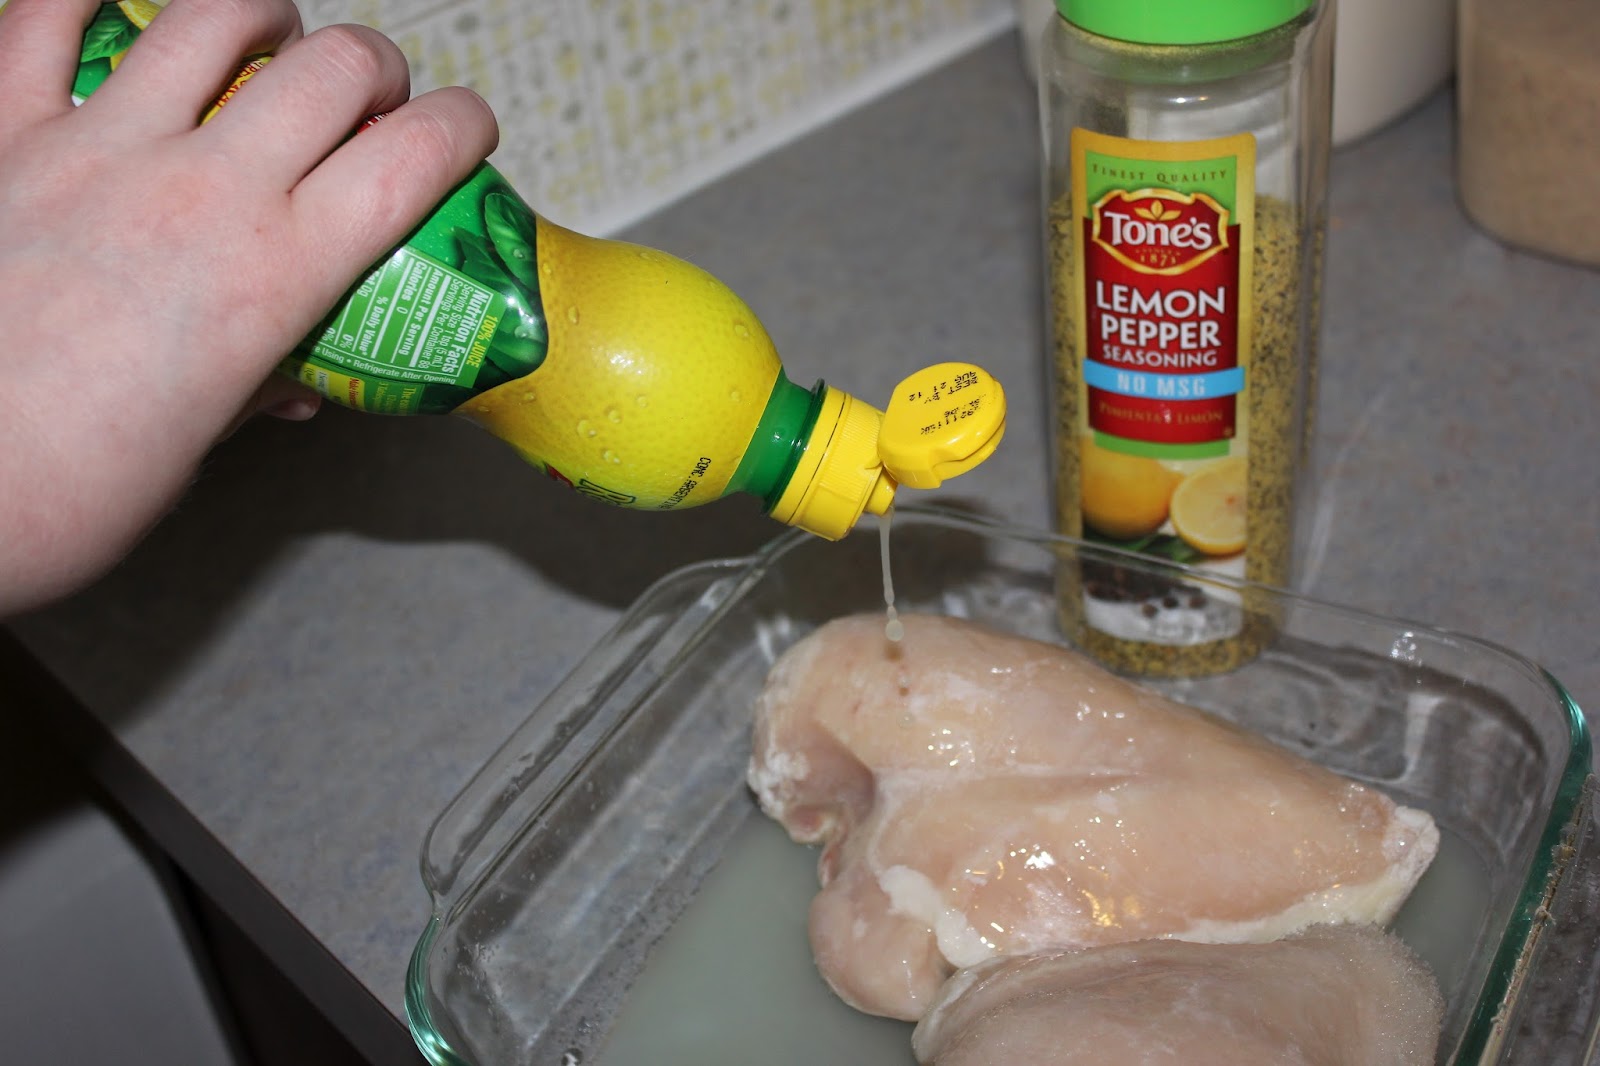
3 ingredients.  Lemon pepper, lemon juice, frozen chicken breasts.


Place the frozen chicken breasts in a baking dish.  Pour the lemon juice over the frozen chicken until it is coated.  The lemon juice freezes to the chicken.  Kinds cool eh?


Sprinkle generously with lemon pepper.


Cover with tin foil (this keeps the chicken moist) and bake for about 50 minutes at 400 degrees.  This baking time depends on the size of the chicken breasts, of course.


When the buzzer rings, take it out of the oven and you have baked lemon chicken.  And you spent what, 3 minutes making it?  Awesome.


Baked Lemon Chicken
From: My Brain
  • Frozen chicken breasts
  • Lemon Pepper
  • Lemon Juice
Preheat your oven to 400 degrees.

Place the frozen chicken breasts in a baking dish.

Pour the lemon juice over them until they have a nice frozen coat.

Sprinkle with lemon pepper to taste.

Cover with tin foil.

Pop it in the oven for about 50 minutes (depends on the size of your chicken breasts).

Remove from the oven and serve.


Thursday, July 26, 2012

Zucchini-Apple Bread


So. It's Michelle again. After a very long absence, I am posting one of our favorite sweet bread recipes. I present to you: Zucchini-apple bread. This stuff is delicious. And addictive. And pretty healthy too, seeing as how it it has a vegetable AND a fruit in it--not to mention some wheat flour.

I know you're dying to make this, so I will give you the recipe right now.

Ingredients:

3 eggs
2 scant C of sugar
3 1/2 tsp vanilla
1 C applesauce or canned apples (no sugar added)
2 C zucchini
2 C white flour
1 C wheat flour
2.5 tsp baking powder
1 tsp baking soda
1 tsp salt
3 tsp cinnamon
1 tsp allspice
1 tsp nutmeg

Here's what you do:

Mix the eggs alone until fluffy. Add sugar, vanilla and applesauce and mix well. Then stir in zucchini. Combine flour, baking powder, baking soda, cinnamon, allspice and nutmeg into separate bowl and mix well. Then stir the flour mixture into the sugar mixture. Pour into two greased 9x5 loaf pans. Bake in the oven at 325 for one hour.

Here are a few things about this recipe you should know:

Today I ran out of nutmeg. Actually, I ran out a few days ago but today I realized it. So instead of using nutmeg and allspice, I added a little more than 2 tsp of pumpkin pie spice. I typically spice this bread to taste, which is why I said "a little more than 2 tsp".  The pumpkin pie spice worked great, although it did add a tiny ginger and cloves flavor.

You don't need a lot of sugar. A scant two cups, so more like between 1 3/4 cups and 2 cups of sugar is good. Even Matt, who usually likes sweet breads a little sweeter, says this is good with less sugar.

I'm guessing at baking times and temperatures. Today I baked it in my oven at 350 for an hour, but my oven is very finicky and bakes slowly. So I'm guessing that your oven is more accurate than mine. Whatever you do, don't overcook it. No one likes a dry, crumbly sweetbread.

This is REALLY GOOD if you put a little real butter on your slice. The butter blends all the flavors. Pretty much like heaven.