Wednesday, May 29, 2013

Chicken Pot Pie


Everyone has their favorite comfort foods.  The first time I can remember tasting this was when I was four or five years old--it's one of my earliest memories!  And I remember it tasting divine.  It's probably been a favorite of mine ever since.  Serve up some chocolate chip cookies for dessert and I'm one happy chick!  It tastes like home and memories.

Now that I'm a mama, I've come to love this pie even more.  I can prep it early and have it ready whenever I need it--awesome!  Meat and veggies in pie form--perfect!  My kids are intrigued from the moment they see the pie in the middle of the dinner table, and stick around at least long enough to nibble on the flaky crust.  Can't go wrong.

Start with an unbaked double pie crust.  This recipe is super simple and perfect for chicken pot pie!

Next, preheat a large skillet with a couple tablespoons oil.  Add chicken and seasonings and cook thoroughly, stirring occasionally.


When the chicken is mostly cooked through, add chopped onions.  If the skillet is getting dry, give it a small drizzle of oil or a couple tablespoons butter.

*If you want to be traditional, at this stage you also mix in chopped carrot and celery.  But I choose the easy road.  See below.


Cook until onions start to become transparent and are starting to caramelize.


Add in mixed veggies.  The blanched/frozen variety.  Lots of them!


Once your veggies are heated through, add in a sprinkle of flour.


Stir it around so everything's coated.  Then pour in some chicken broth.  (milk or water work, too)


It'll seem a little watery, but after you cook it for a few minutes it thickens up nicely!


Remove from heat and pour into prepared bottom pie crust.


Top with another crust.


Seal the edges and cut vents for steam to escape.  Cover and refrigerate (or freeze) until ready to bake!  You can refrigerate for up to 2 days or freeze (cover it with aluminum foil to prevent freezer burn) up to 3 months.


Bake in preheated oven for 40 minutes, or until crust is cooked.  The center needs to look a little browned, too, to ensure the bottom crust has time to bake.  Your chicken is already cooked, so no danger there--doughy pie crust is just disappointing!  If the edges start to get too brown, cover them with foil while you continue to bake the pie.


Lightly toasted and gorgeous!  Let it sit at room temperature for 15-20 minutes to make it easier to serve.


Chicken Pot Pie

1 prepared double pie crust
2 T oil or butter (more if needed)
2 chicken breasts (or 1/2 to 1 lb), chopped
1/2 tsp paprika
1 tsp parsley
1/4 tsp sage
1/2 tsp salt
pinch pepper, or more to taste
1 small onion, chopped
2 cups frozen mixed vegetables
1/4 cup flour
1 1/2 cups (one 12 oz can) chicken broth, milk, or water

Prepare pie crust, leaving top off.  Preheat oil in large skillet.  Add chicken and seasonings and cook thoroughly, stirring occasionally.  Add onion (and extra oil, if needed) and cook until onion becomes transparent and begins to caramelize.  Stir in vegetables and heat through.  Sprinkle with flour and mix to coat.  Pour in chicken broth and simmer until sauce begins to thicken.  Pour contents of skillet into prepared bottom of pie crust.  Top with second pie crust.  Seal and cut slits to vent steam.  Cover and refrigerate or freeze, if desired.  Otherwise, bake in preheated 400 degree oven for 40 minutes, or until entire top crust begins to brown, adding foil around edges of crust if it becomes too dark.  Allow to cool 15 minutes before cutting and serving.

Monday, May 6, 2013

Belgian Waffles with Easy Berry Syrup and Sweetened Whipped Cream


This tops the charts as one of my all-time favorite breakfasts!  If I were visiting my Mama for Mother's Day this year, I would definitely whip up a batch for her.  

I love them because they're easy enough for a weekday morning, but delicious enough for a special occasion.  These waffles are crispy, with a rich flavor imparted from the yeast they use to rise.  Serve them with maple syrup, or my favorite--raspberries with sweetened whipped cream!

Start by combining warm milk and yeast in a LARGE mixing bowl.  Don't skimp on the bowl size--you'll regret it later!  Allow to sit for ten minutes until bubbly and frothy.  (Mine is pictured with water since we cook with powdered milk.)


In a separate glass measuring cup, combine eggs, vanilla and oil.  You can use melted butter if you're feeling extra fancy, but be careful not to cook the eggs in hot butter!

Traditionally, only egg yolks are used in this step and you beat the egg whites and fold them in later.  However, with several young children clamoring at my heels for breakfast, I've never taken the time to add that step, but I've never regretted omitting it.


Add the sugar and mix well.


Then add your dry ingredients.  If you're not using milk powder, you'll just be adding flour and salt in this step. If you are, combine the flour and milk powder before incorporating into the wet ingredients.


Cover and let rise for one hour.  So if you're starting in the morning, you'll have to plan ahead.  But this is one reason I love this recipe so much--make it the night before and refrigerate it all night!  Just remember to bring it out of the fridge while the waffle iron heats up so the batter's not too cold.


The batter will be bubbly and risen!


For a quick and easy berry syrup to top your waffles, place prepared berries in a small bowl and coat with a couple tablespoons of sugar.  Refrigerate overnight with the batter.  Frozen berries work great!


Preheat your waffle iron and pour recommended amount of batter according to the manufacturer.  Little tip:  put a little less batter than the manufacturer recommends, lest the batter oozes out the edges and makes a big mess.


Oooh, steamy!  


Remove from waffle iron when golden and crispy.  I like them toasted and crispy, so we go for a medium-dark look on our waffles.  If you like light and fluffy, though, time it a little less.  Our waffle iron takes 4-5 minutes for the dark and crispy version.


And for the topping--sweetened whipped cream!  Pour chilled cream into a medium mixing bowl.


Whip with an electric mixer...


adding sugar...


and vanilla, preferably with the mixer running (but not if you're photographing at the same time, unless you have three hands).


Mix, mix, mix until stiff peeks form.


Stiff peeks hold their shape when formed.  But only while the cream is cold, so serve immediately!


Belgian Waffles

3 cups warm milk
1 T active dry yeast (or one packet)
3 eggs
3/4 cup oil or melted butter
2 tsp vanilla
1/3 cup sugar
4 cups flour
1 tsp salt

Sprinkle yeast over milk in large mixing bowl.  Allow to sit for ten minutes, or until bubbly and frothy.  Combine eggs, oil/butter and vanilla in glass measuring cup and mix well.  Pour into yeast mixture.  Add sugar and mix well.  Add flour and salt and mix well.  Cover and let rise one hour, or overnight in the fridge.  If refrigerated, allow batter to warm for a few minutes while waffle iron preheats.  Pour just under recommended amount of batter onto preheated waffle iron. Cook until waffle is golden and crispy, about 4 minutes.  Serve warm, or cool on cooling racks, store in freezer bags for toasting on hurried mornings.

Easy Berry Syrup

2 cups berries, washed and cut into small pieces
2 T sugar (or more, if berries are tart)

Place berries in small bowl.  Sprinkle berries with sugar and refrigerate overnight.

Sweetened Whipped Cream

2 cups heavy whipping cream
2 T sugar
1 tsp vanilla

Chill whipping cream and bowl, if desired.  Pour cream into medium mixing bowl and whip with electric mixer on high speed, adding sugar and vanilla while mixer runs.  Continue to mix until stiff peeks form.  Serve immediately.

Monday, April 29, 2013

Sautéed Vegetables


You have to trust me when I say:  this tastes much better than it looks!  Or sounds, even.  Sometimes when I'm feeding hungry kiddos, I can't take the time to arrange a pretty plate.  Sometimes Dr. S serves me and doesn't "plate" the food for a picture, either, because he doesn't know I'm planning to photograph it.  So you get what you get!

This one isn't rocket science, but I just barely learned how to do it myself!  I was babysitting for a friend, and she'd laid out some frozen chicken nuggets to make it easy, and then made sure I knew how to saute broccoli.  

What? You can saute broccoli?  And kids will eat it?

It's true.  You can!  And they will!  And it's yummy!  Here's how.

Choose vegetables with similar cooking times and qualities.  Broccoli and asparagus.  Sugar peas and green beans.  Onions and bell peppers.  Potatoes and parsnips.  Carrots and apples! (yes, I know apples are not vegetables)  Wash veggies and chop or slice as desired.  Melt butter.


Add fresh seasonings.  Here I'm using garlic, but you can use fresh herbs (parsley, oregano, rosemary, basil, cilantro) or freshly ground spices (nutmeg, ginger, cinnamon).


When it's good and golden add dry spices.  (salt, pepper, dry herbs and spices)


Then in go the veggies.  No water needed!


Toss 'em around until they're bright and tender--a little crunch is okay!


Sauteed Vegetables

2 T butter
1 tsp freshly minced seasonings (choose from garlic, basil, oregano, parsley, rosemary, ginger, nutmeg, cinnamon, etc)
1 tsp dry seasonings (choose from salt, pepper, savory and sweet spices, etc)
1-2 lbs. fresh vegetables or fruits

Wash and cut vegetables.  Melt butter in large skillet. Saute fresh seasonings in melted butter for one minute.  Add dry seasonings and stir.  Add prepared vegetables and cook 5 to 20 minutes, tossing occasionally, or until brightly colored and tender with a slight crunch.

Monday, April 22, 2013

German Pancake with Strawberries


I'd never heard of German pancakes until after I got married.  I found a recipe for one in a cookbook someone gave us as a wedding gift.  The recipe perked my interest, and I decided to try it--more for the combination of sour cream and strawberries than the pancake, I think!

Well, we loved it.  German pancakes are a dense, custard-like baked pancake.  You can top them however you want, and they'll still be delicious!  One of the most traditional ways is with cooked cinnamon-sugar apples.  My kids love them drizzled with vanilla yogurt and topped with any kind of berry.  But give the sour cream, brown sugar and strawberries a try--you won't be disappointed!

A single recipe can be mixed up in the blender, which is better for combining the ingredients.  Bake it in a pie plate or 8" square pan.  For our family of six, I double it and make it in a 9x13" pan.

Start by placing the pan in the oven as it preheats to 425.  Place the butter in the bottom of the pan to melt.


Combine all the ingredients, either in the blender for a single recipe, or in a very large mixing bowl with an electric mixer or a whisk for a double recipe.


When the butter is melted and the batter thoroughly mixed, pour the batter into the hot baking dish.  


Bake for 20 minutes at 425, then reduce heat to 350 and bake an additional 8 minutes, or until puffy and golden.  Isn't it gorgeous?


Allow to cool slightly before slicing and serving with a few of these beauties.  Can you believe this strawberry?


Don't forget the sour cream and brown sugar!

German Pancake with Strawberries
adapted from The Essential Mormon Cookbook

2 T butter
1 1/2 cups milk
3/4 cup flour
1/4 cup sugar
3 eggs
1/4 tsp salt

Place 9" pie plate or 8" square pan in cold oven.  Put butter in pan.  Preheat oven to 425 degrees.  While the oven is preheating, place remaining ingredients in blender or large mixing bowl and mix well until thoroughly combined.  When oven is hot and butter melted, pour batter into hot pan and return to oven.  Bake for 20 minutes, then reduce heat to 350 and bake another 8-10 minutes, or until golden and puffy.  Remove from oven and allow to cool slightly before cutting and serving.  Top with strawberries, sour cream and brown sugar, or other toppings as desired. 

Tuesday, April 16, 2013

Angel Cake Supreme


This is a recipe from my mama.  When she was a recent bride and an even newer mama, her sisters and mom worked together with some ladies at church to contribute to a cookbook.  Whether it was motherly intuition or just a desire to share her favorite recipes, Mama ended up with a handful of these cookbooks and once she knew she had a daughter (me!) to share it with, it got stashed away in my hope chest, waiting for the day when I'd be old enough to use it.  

Now I'm married with kiddos of my own, and this is one of my favorite cook books.  It's got old fashioned treasures, like homemade saltines, graham crackers, every kind of pie, and other down home cookin' goodies.  

This recipe for angel food cake is probably similar to any other recipe, but I love that it's a classic favorite that's stood the test of time.  It does take some effort, so we save it for special occasions--specifically Easter in our family.  

You start by separating a dozen (yes, 12!) eggs.  I'm demonstrating in the photo.  Carefully crack the egg in half, then let the whites fall into a bowl while reserving the yolk in the shell.  You can save the yolks for a future purpose, like homemade ice cream or creme brulee!


Combine egg whites, cream of tartar, salt, and vanilla in a large mixing bowl.  I highly recommend a stand mixer if you have one, because there will be a lot of mixing going on here.  But if you don't have one, a large bowl and an electric hand mixer will do the job.


Beat until soft and glossy.


Meanwhile, sift together flour and powdered sugar.  I don't have a sifter, so I just whisk them together in a bowl, and that works just fine for me!


Stop the mixer after soft peeks have formed.  The meringue will still be glossy.


Add the granulated sugar a little at a time and continue to beat the egg whites.


Lots of sifting!  Make sure no lumps remain!


The meringue is ready when it holds stiff peaks--that means it mostly holds shape when moved.


Sprinkle on a little of the flour mixture...


and fold it in gently with a spatula.  Continue to do this a little at a time until the flour mixture is used.


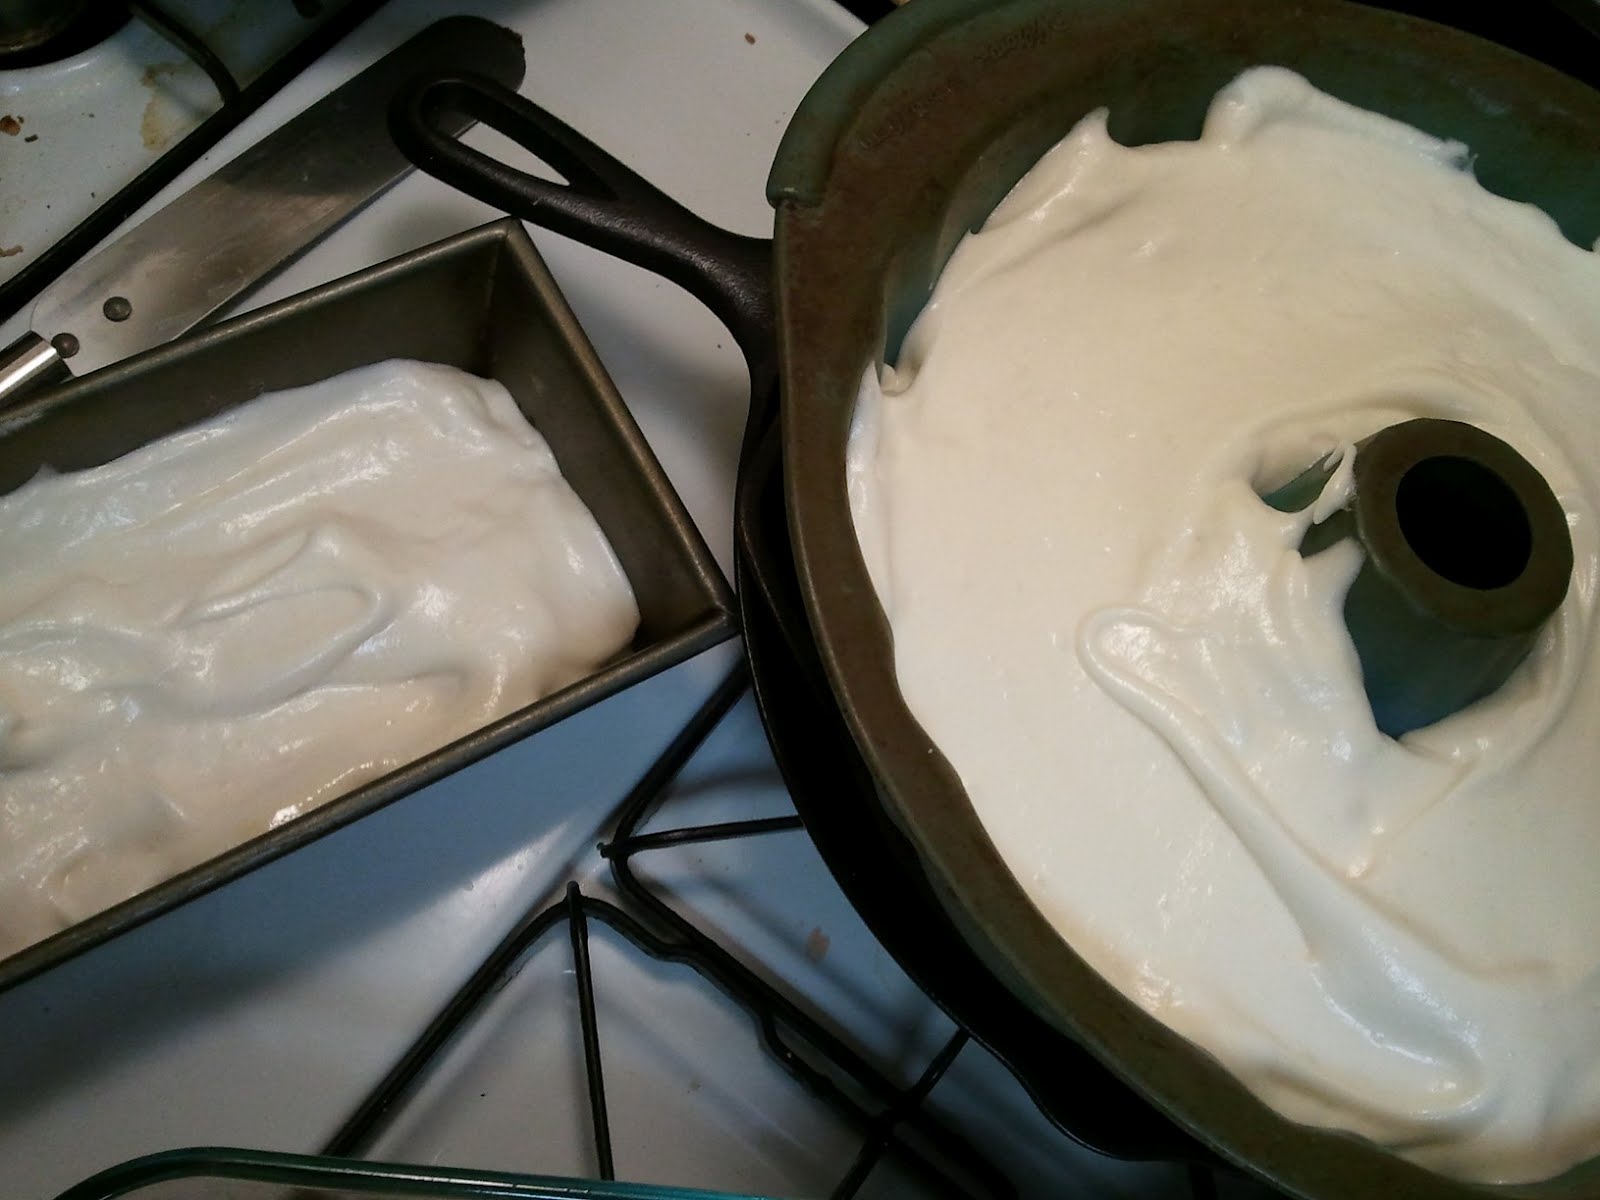
Now.  You will have 16 cups of batter.  Usually, this fills a 10" tube pan.  I don't have one, so I use a bundt pan and a loaf pan.  Be warned, though, that you don't grease the pans, and it may be difficult to get the cake out!  This article from allrecipes.com on cake pan conversions is really helpful in helping you decide what pans to use with what you have already!  

Spread the batter into your ungreased pans.


The cake is ready when it's golden in color and springs back after light touch.  Use a knife around the edges to help rescue the cake from those unorthodox pans!


Turn the cakes upside down on a cooling rack...


and wait until completely cooled to remove from the pan.  I like the silicone bundt pan for obvious reasons here!  You can frost the cake with whipped cream and topped with strawberries, but it's gorgeous on its own, and then you can serve individual slices with various toppings such as berries, whipped cream, ice cream, hot fudge, or whatever else sounds good!


Angel Cake Supreme

1 cup flour
1 1/4 cup powdered sugar
12 egg whites
1 1/2 tsp cream of tartar
1/4 tsp salt
1 1/2 tsp vanilla
1 cup granulated sugar

Sift flour with powdered sugar three times.  Beat egg whites with cream of tartar, salt, and vanilla until stiff enough to hold soft peaks, but still moist and glossy.  Beat in granulated sugar, 2 T at a time, and continue to beat until meringue holds stiff peaks.  Sift about 1/4 of the flour mixture over eggs; fold in.  Fold in remaining flour by fourths.  Bake at 375 in an ungreased tube pan for 30 minutes or until top springs back without leaving mark when touched lightly with finger.  Invert cake on cooling rack and let cool completely before removing from pan.