Monday, October 14, 2013

Pumpkin Pancakes


Whenever we disappear for awhile on the blog, it's usually for one of two reasons:  1. we have illness or injury at our house that changes the list of priorities, and thus the blog takes a "back burner" or 2. we're much more enveloped in spending time with family, again shifting priorities and leaving the poor blog to fend for itself.  In the past two weeks, we've had both.  So forgive me for the long silence.  We're back.

These pictures are old and horrible, but since pancakes are hard to do wrong (even with awful pictures), I'm posting it anyway.  I promise they'll taste better than I photographed them eons ago.  

This is a simple, yummy twist on a universal favorite.  It adds a little fall flavor and spicy spunk to an otherwise quick and easy breakfast.

As always, start with mixing the dry ingredients.  Today we're adding some lovely sweet spices.


All mixed!


Then combine the wet ones (including pumpkin!).


Mix those wet ingredients well!


Pour the wet ingredients into the dries,


(including milk [or water, if using dry milk powder])


and give it a gentle stir.


Spoon some batter onto a greased and hot griddle.


Flip 'em when they start to get golden underneath (not burned like my first couple were...).


They'll have a nice orangey hue with a light brown tan on either side.  Drizzle with maple syrup for a simple, yet delicious, combination.


Pumpkin Pancakes
from allrecipes.com

2 cups flour
3 T brown sugar
2 tsp baking powder
1 tsp baking soda
1 tsp allspice
1 tsp cinnamon
1/2 tsp ginger
1/2 tsp salt
1 1/2 cups milk (or water + equivalent milk powder mixed with dry ingredients)
1 cup pumpkin puree
1 egg
2 T oil
2 T vinegar

Combine dry ingredients in medium mixing bowl.  Mix together.  Add wet ingredients to glass measuring cup and mix well.  Pour wet ingredients into dry ingredients, then stir gently until just combined.  Spoon onto greased, hot griddle.  Flip when golden on underside.  Serve warm with maple syrup.

Saturday, September 21, 2013

Freezer Food: Burritos


Cooking for the freezer is one of my favorite ways to make life easier around here.  We have a whole posse of boys to feed around here, and sometimes, the food needs to be ready NOW.  Burritos are one of my favorite ways to make that happen.

I also love making these for the freezer because I can control what goes inside them.  I try not to make a big fuss about "additives," but sometimes enough is enough and I just want to know what's going into my kids' tummies.

So, let's get started, shall we? This is super simple.  Sorry in advance for the lighting--this was best done without children, which meant after they were all sleeping.

I just start by creating stations for each ingredient along an assembly line in the kitchen.  You can put whatever you want inside your burritos, but I'm doing cheese, rice and beans.  Simple and filling.


Begin with a layer of plastic wrap.  It will help catch any drips and also serves as a carrier as you slide the burrito across the work surface.  Throw your tortilla right in the middle.  You can do homemade, (click here for the recipe) or if you're feeling lazy like I was, just buy some from the store.  


You can order the ingredients however you like, but this is how I did it:  cheese first,


then plenty of rice (white or brown--I'm using white here), 


and then the beans! (recipe here)


Now for the crazy part:  rolling the burrito.  Watch this!  

Fold it over, 


all the way over!


Grab those fillings and squeeze 'em toward you a little!


(Ignore the fact that my fillings are falling out, and then) Fold over one side, 


then the other side.  It should be a cute little bean pocket now!


Then roll 'er over and you're all done.  


Use that plastic to help you keep it in place.  (Another reason why I love starting the assembly line with plastic.)


Just tuck & roll, man.


Line up the troops while you finish filling.


You can also do it this way, and line up several burritos at once.  I find it goes a little bit faster, but it's also messier.


Throw them into a freezer bag for easy labeling and storing, and to prevent freezer burn.


To reheat, take out of the plastic, wrap in a paper towel, and microwave for 1-2 minutes.  These also work really well packed in lunches--they're all thawed out by lunchtime!

How To:  Freeze Burritos

Burrito ingredients:
rice
cheese
meat
salsa
(or whatever you want)

Materials:
plastic wrap
freezer bags
permanent marker

Fill and roll burritos.  Wrap in plastic wrap.  Put wrapped burritos in freezer bags.  Label bags.  Freeze.  To reheat, take out of plastic, wrap in a paper towel, and warm in microwave for 1-2 minutes.

Wednesday, September 18, 2013

Spiced Pear Bread


I didn't mean to disappear into the great abyss for the past few weeks.  Anyone with school-aged children knows this time of year is crazy.  And that, my friends, is what you would call an "understatement."

That aside, here's a yummy snack for after school, or a lazy Saturday breakfast.  It freezes beautifully, so if you're really feeling ambitious, mix up a bunch and save some for a weekday breakfast when everyone's in a hurry and you need something you can throw at them as they run out the door.

This recipe was born from an over-abundance of pears a couple of years ago and the desire to not. waste. one. single. bit.  I found a good starter online, and went from there.  As with most recipes, you can adapt to your desired tastes, but I definitely recommend trying it out as written at least once!

Start by mashing the pears.  I find this is easiest with pears that have been prepped for canning, or pears that are already canned (or frozen).  You can start with fresh pears; you'll just have to peel, core, and slice them before you can do anything else with them.


I like to leave a few big chunks so there are still bites of juicy pear in there, but you can make it more saucy if you prefer.


Add the beaten eggs, sugar and oil to the pears.


Once that's all mixed and the sugar dissolved, add the dry ingredients.  Stir to combine, but don't over mix.


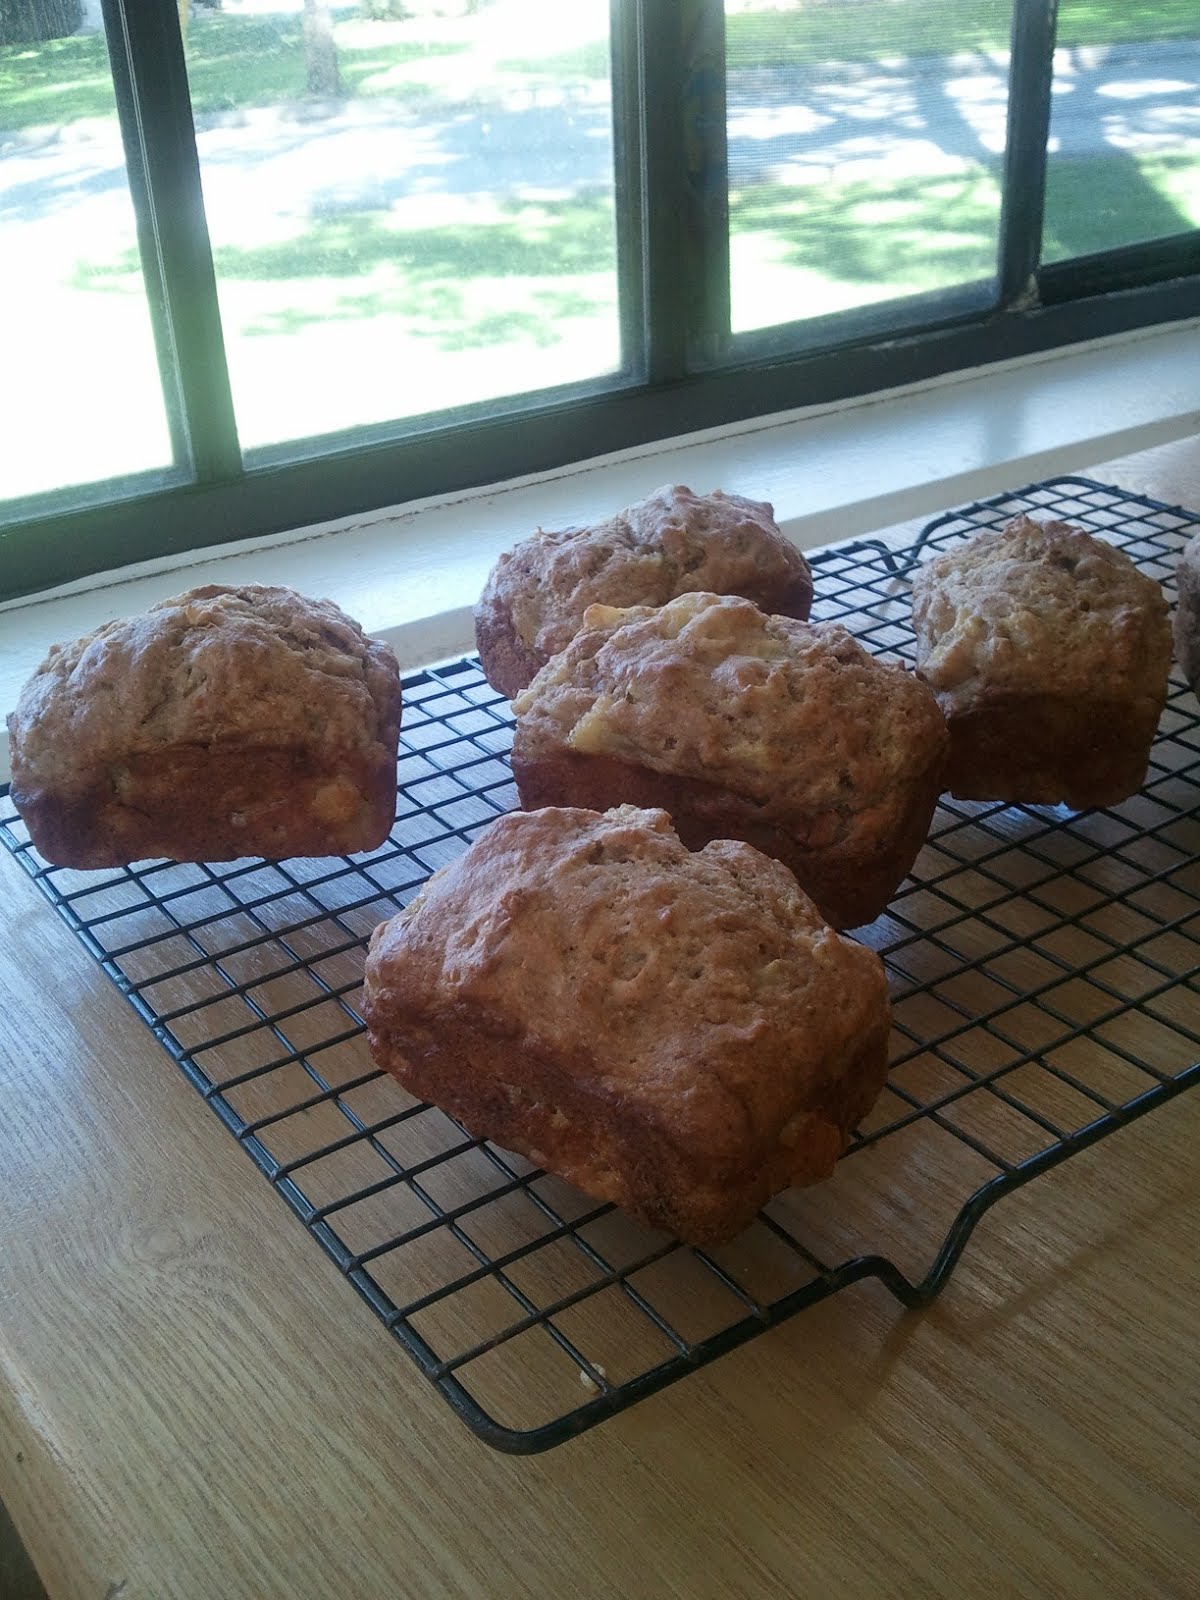
Divide it into your baking pan of choice!  This recipe makes 3 regular sized loaves, 12 mini loaves or 24 muffins.  


Here's another trick with any leftover batter.  You can do this with pretty much any quick bread/muffin mix.  If necessary, add a bit of milk to make the batter similar to pancake batter, then cook on a griddle!  It works much more nicely for instant gratification when you smell all those wonderful spices wafting through your kitchen.


And also?  It's so much more kid friendly.  I don't know about you, but at our house, quick breads and muffins mean a big, crumbly mess.  But pancakes are great finger food when you serve them cold and without toppings.


Don't forget to turn those loaves out onto a cooling rack.  You don't want soggy bottoms.


(And honestly, those mini loaves slice up for little hands pretty nicely, too.)


Spiced Pear Bread

6 cups pear halves, peeled and sliced (about 3 pints/cans or 2 quarts, if you're using bottled/canned pears)
1 cup sugar
1/2 cup oil
3 eggs, beaten
3 1/4 cups flour
3 tsp cinnamon
1 tsp cloves
1/2 tsp salt
1 tsp baking soda
1 tsp baking powder

Mash pears in medium mixing bowl.  Add sugar, oil and eggs and mix well.  Combine dry ingredients, then mix into wet ingredients until just moistened.  Do not over mix.  Divide into greased baking pans (3 loaf pans, 12 mini loaves, or 24 muffins) and bake at 350 until golden brown (about 45-60 minutes for regular loaves, 20-30 minutes for mini loaves, 15-20 minutes for muffins).  Cool completely on wire racks before slicing and serving.  Freeze if desired; defrost at room temperature.

Monday, August 19, 2013

Beans for Burritos


Beans.  This is a genre of food some people need to learn to love.  I was probably one of them.  

When Dr. S and I were newlyweds, we were still working on our undergrads and very poor.  So we ate a lot of beans.  We substituted beans in lots of places you might normally use meat, and learned to appreciate the flavor and texture of various varieties.  

Here's a little secret for you:  all it takes is a good recipe.  You just have to try something that actually tastes good, and voila!  You're a bean lover.  

First things first--you don't have to save these beans just for burritos.  You can serve them as a side dish or over rice, or heap them in a big bowl with cornbread or warm tortillas.  Mash them up and use them in a layered dip.  Cool them and toss them into a bean salad.  Whatever floats your little bean boat.

This recipe is very simple, very filling, and very delicious.  You start by soaking the beans.  Dump them into a large bowl and cover them with water--plenty of extra water!  (Sorry I forgot to snap a picture for this part.  But you can put beans in a bowl of water, yes?)  If they're really soaking up that water quickly, add some more water before you go to bed.  Leave them out on the counter while you sleep.

In the morning, drain and rinse those beans. 


Note:  you can skip the soaking step, but I hear the soaking and rinsing cuts down on the "potency," if you know what I'm sayin'.

Next, put the beans in a crock pot (or you can use a large pot on the stove, but then you'll have to babysit it) and cover with lots of fresh water!  Or chicken/beef/vegetable stock.  I usually just go with the water, though, and add bouillon later.


Cook on high for about six hours.


If the beans are popping out of the top of the water, add more!


After about six hours, the beans should be pretty much cooked.  You don't want to add particular ingredients (especially acidic ones) during the cooking process, because it halts the cooking process for the beans.  So cook the beans first, then season them.  Okay?

Add a few hot chilis.  Jalapenos work great, but I always use serranos, since we have a bush in our garden.  I add 3-4 small serranos, seeds removed.  This gives the beans a little kick, but still mild enough for the kiddos.  If you leave the seeds in, it'll be pretty spicy!  Just so you know.


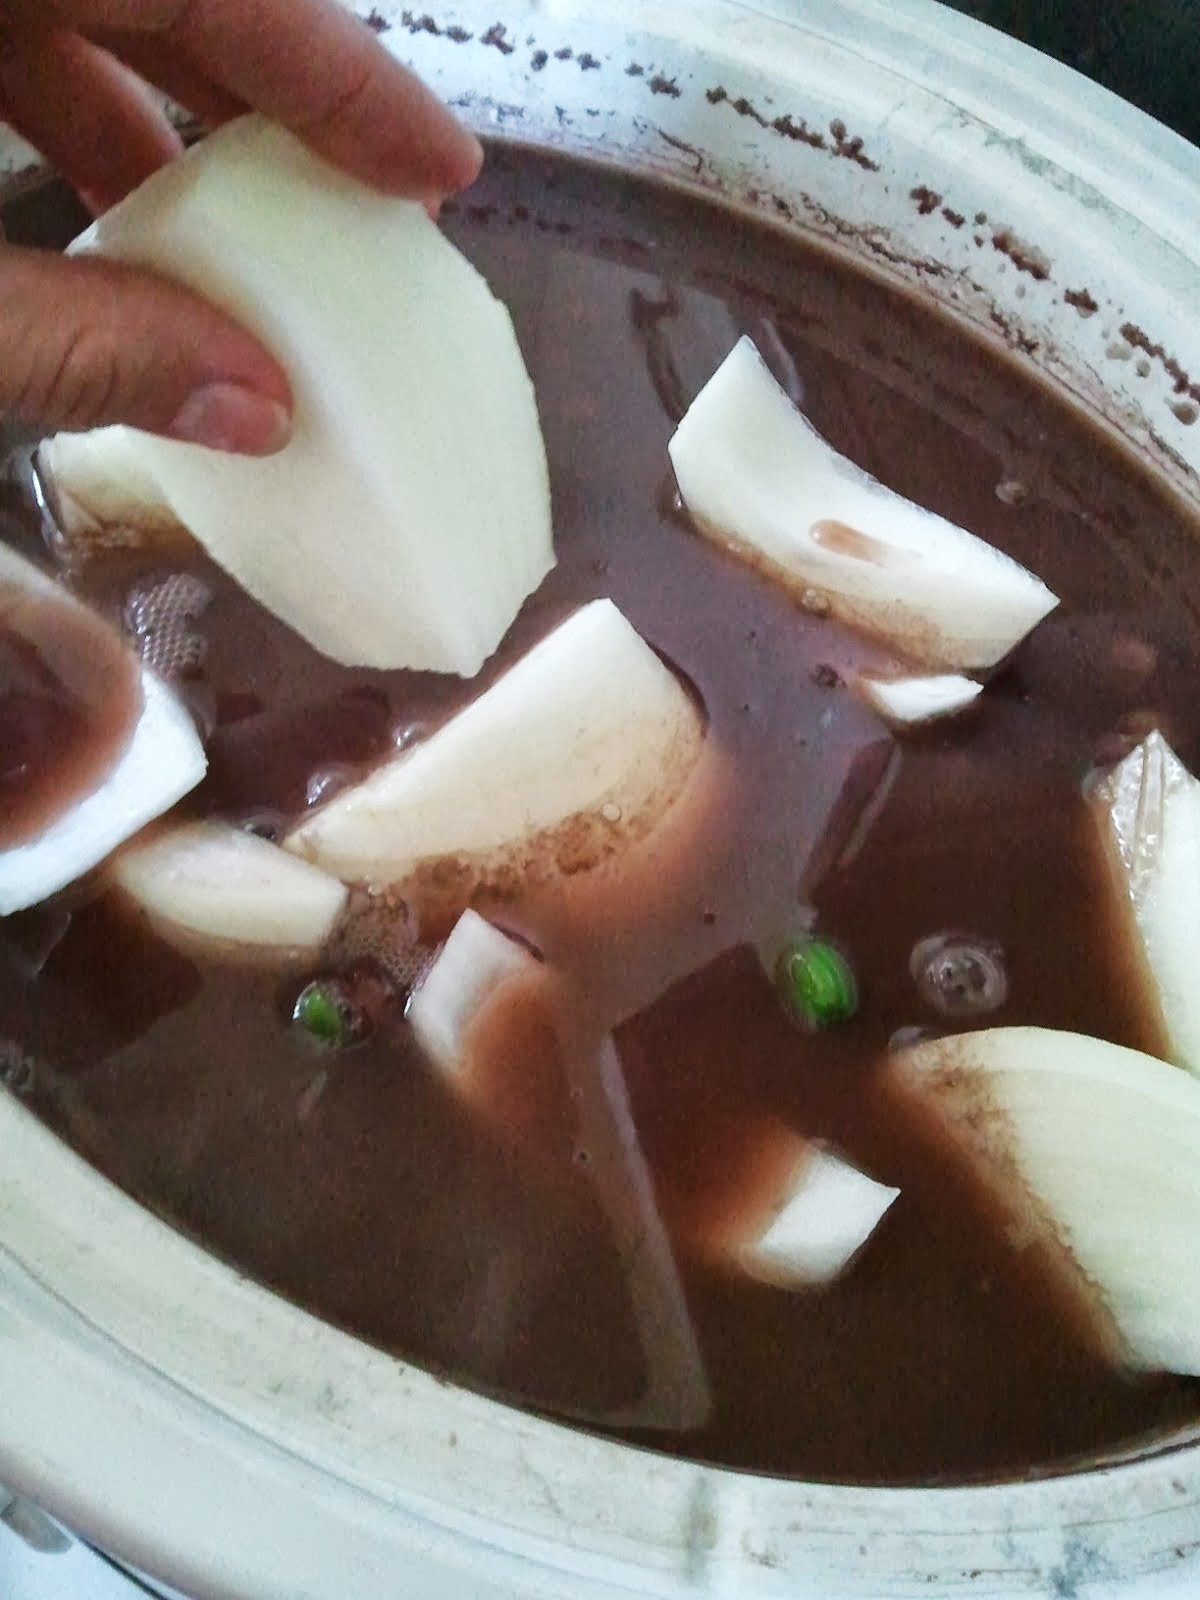
Next, I throw in a couple onions.  Don't bother with chopping--just peel and quarter and call it good.


Plenty of minced garlic...


and a little cumin for some flair.


And lastly, make sure you salt that pot of beans!!  Please.  You'll regret it if you don't.  If you're using broth or bouillon though, check the salt content there before adding more.  You can always taste the broth in the pot and add to it.


Let that cook on low for another couple hours, then serve 'em up.  These can be served as a side dish, over rice, or (of course) stuffed in a burrito.  You can also drain most of the broth, reserving about 1 cup just in case, and mash with a potato masher (don't puree the heck out of the poor things) to get that "refried" bean texture.

IMPORTANT STEP HERE.  Before serving, stir the pot and sift out those chilis.  Unless you really like things hot--then don't worry about it!  Just don't get mad at me if you forget and fold that serrano into your 4-year-old's burrito.


Beans for Burritos

2 lbs dry beans, any variety
several quarts of water or stock--be prepared with at least 1 gallon
3-4 small chilis, or 1-2 large, sliced down the center and seeded.
2-3 onions, peeled and quartered
1 tsp ground cumin
bouillon, if desired (I go with about 6 cubes)
salt, to taste (start with 2 tsp)

Pour dry beans into large bowl and cover with water, at least two inches above beans.  Let sit on counter overnight.  In the morning, drain and rinse beans.  Pour into crock pot and cover with fresh water or stock.  Cook on high for 6 hours.  Add water or stock if beans begin to absorb the liquid too quickly.  When the beans are cooked, add chilis, onions, cumin, bouillon and salt.  Mix well, replace the lid, and cook on low an additional 2-3 hours, or until ready to serve.  If desired, drain broth, reserving 1 cup, and mash with potato masher.  Serve in burritos, over rice, as a side, in a salad, in a dip, or however you desire.  Makes 40 side servings, or 20 generous helpings.


Tuesday, August 13, 2013

Chewy Granola Bars


I found this recipe a couple years ago when I was trying to lessen the sting of a "no dessert" diet.  I was banned from making cookies, cakes, pies, sweet rolls, and anything inherently dessert.

However, I'm a baker at heart, and staying out of the kitchen and away from the oven was almost harder than not eating the results of what comes from them.  Baking often serves as a kind of therapy for me, especially when there's a delicious payoff at the end.  

So I baked a few loaves of white bread, and that tided me over for a few days.  But I still really just wanted a cookie, and it drove me crazy that I couldn't make any!  I went on the hunt for a "healthy" replacement, and this is what I found.  Granola bars are really just cookies in disguise, but I won't tell if you don't.

These granola bars are not crunchy at all, (unless you put nuts in them) but that's why I love them for our kids.  For a crispy granola bar, try this recipe.  Our crispy granola bars are a little crumbly but these are not super crumbly, they're a pretty substantial snack, and they travel well.  They'd be perfect packed in a school lunch.

Start by mixing the dry ingredients in a large mixing bowl.


Add the wet ingredients,


and mix well.


Press into greased pan.  The original recipe makes a 9x13 inch pan, but here I doubled the recipe, so I used a half sheet pan.


Bake until lightly golden (not completely browned, like I accidentally did).  All the way browned is still good, but barely browning on the edges is better.


After about ten minutes of cooling time, cut into bars.  Don't forget!  You'll regret it.


Allow to cool completely before serving.  Store covered for up to 2 weeks, or in the freezer for several months.

Chewy Granola Bars

2 cups rolled oats
1/2 cup brown sugar
1/2 cup wheat germ (can substitute oats or flour if you don't have any)
3/4 tsp cinnamon
1 cup whole wheat flour
3/4 cup raisins, chocolate chips, nuts, or other mix-ins
3/4 tsp salt
1/2 cup honey
1 egg, beaten
1/2 cup oil
1 tsp vanilla

Combine oats, brown sugar, wheat germ, cinnamon, flour, salt and mix-ins in large mixing bowl.  Mix well.  Combine Remaining ingredients in glass measuring cup and mix well.  Pour wet ingredients into dry ingredients.  Stir to combine.  Press mixture into greased 9x13" pan.  Bake at 350 for 20-25 minutes, or until edges begin to brown and center looks set.  Remove from oven.  Allow to cool ten minutes before cutting into bars.  After cutting, allow to cool completely before serving.  Store covered at room temperature for up to two weeks, or several months in the freezer.